Pixelating Masks
You need an interesting transition, or don't want to show a part of the screen to the viewer? Pixelate the result!
First create a Mask-component. The transparency of the Mask Folder content defines how pixelated it should be; transparent = clear, opaque = pixelated (can be reversed by checking the Inverse Mask property inside the mask). You can also leave the mask-part empty, and invert the mask to get a full-screen effect.
Pixelation Types
There are currently four types of pixelation available: quads, triangles, hexagons and voronoi islands. You can see their respective results in the following image:
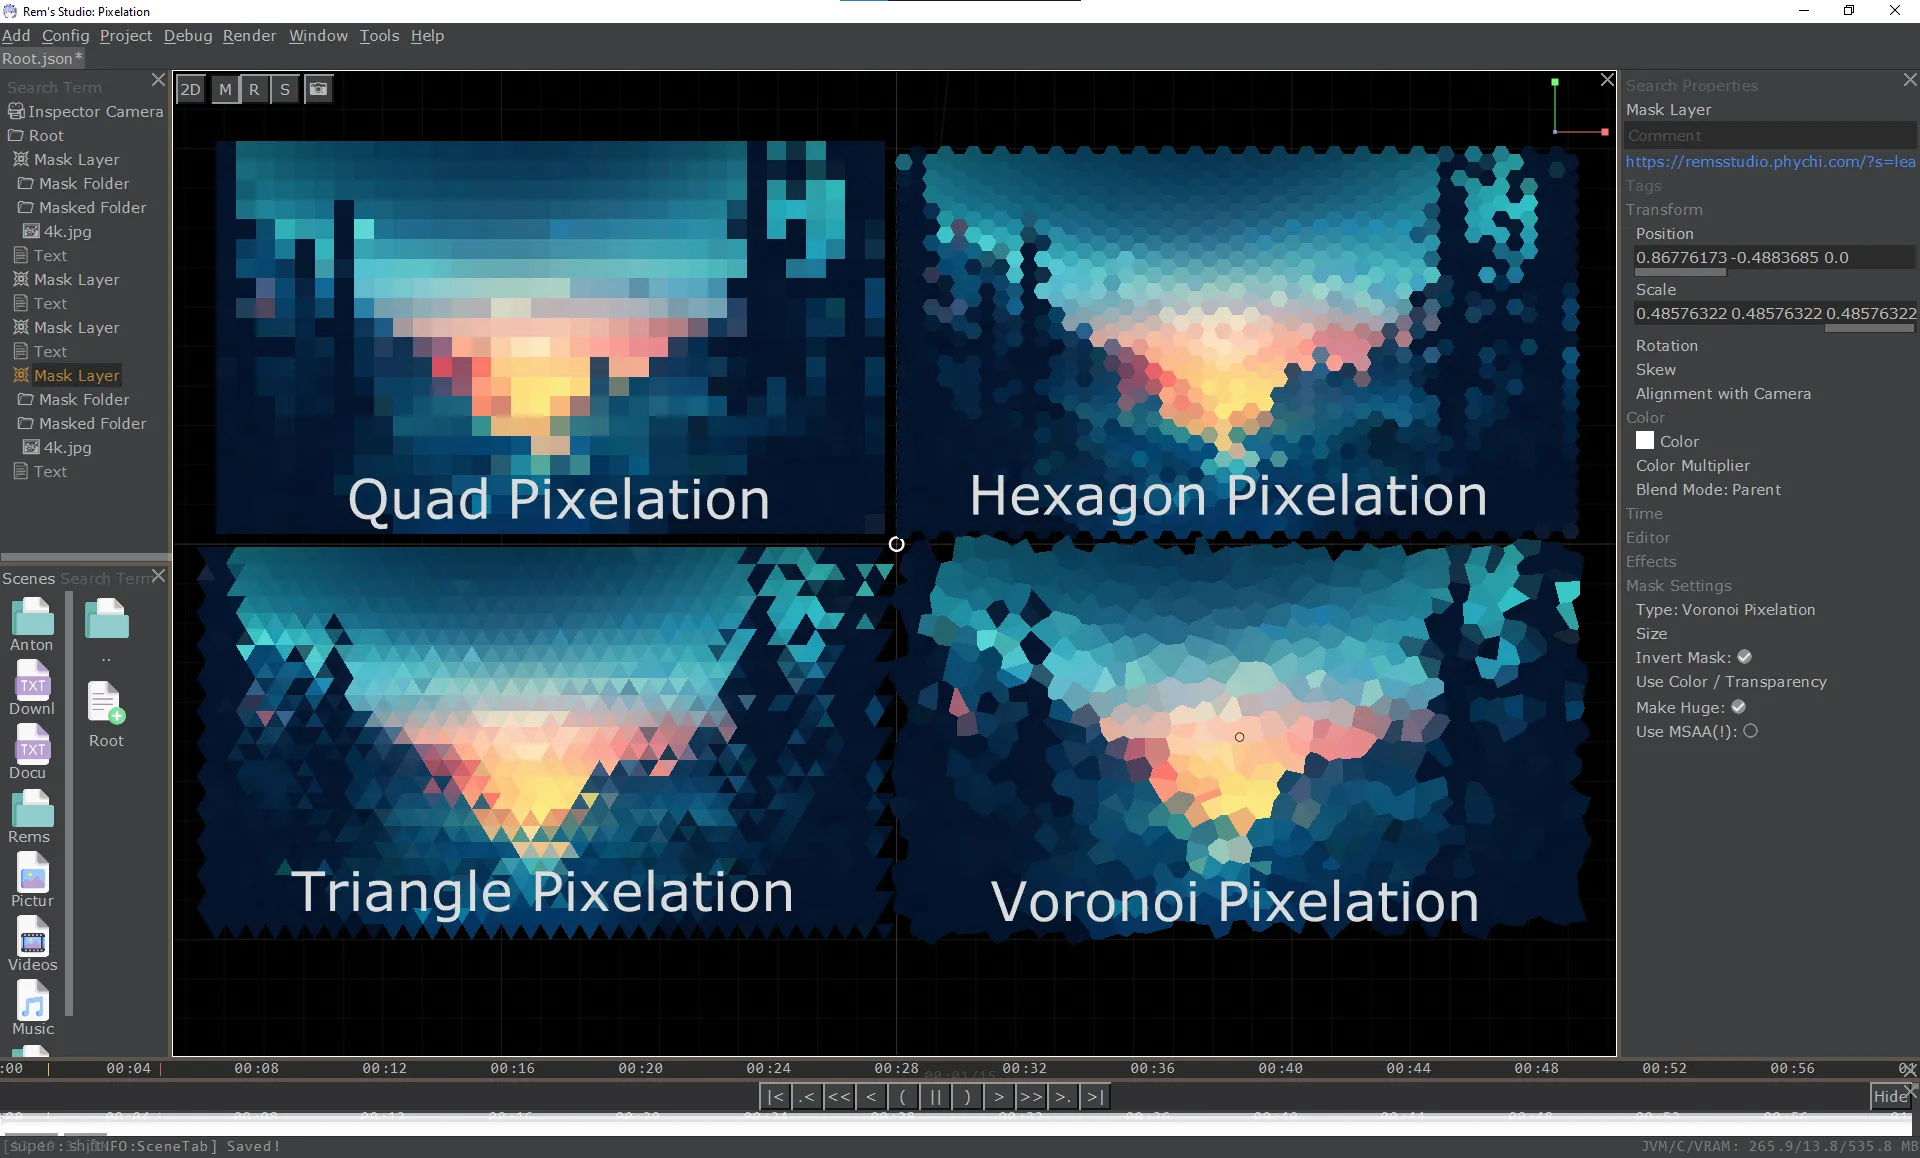
The mask has been left empty in this sample, because I wanted the whole image to be blurred.
Sample with complex/animated mask
The following image shows a mask build from two circles and a rectangle for the faces and the license plate of the car. You can animate each individually to let them track their to-be-blurred targets. Automatic tracking isn't available yet.

You can use the Size property of the mask to change the size of the pixels.
Stutter
Stutter can make tracking hard. While there is currently no stutter-remover, you can use the shift key to play back your scene at 20% speed.
Here is a short video, where I applied this, and pixelated the faces of Hermine and Ron, and the car plate.
Created: 11:03, 12. Dec 2020; Most recent change: 13:26, 27. Nov 2023